Steven K. Dixon 2018
The following is a narrative of my first mission using the latest playtest rules. The left column is a mix of narrative and rules, while the right column details the rules and has links to pictures.
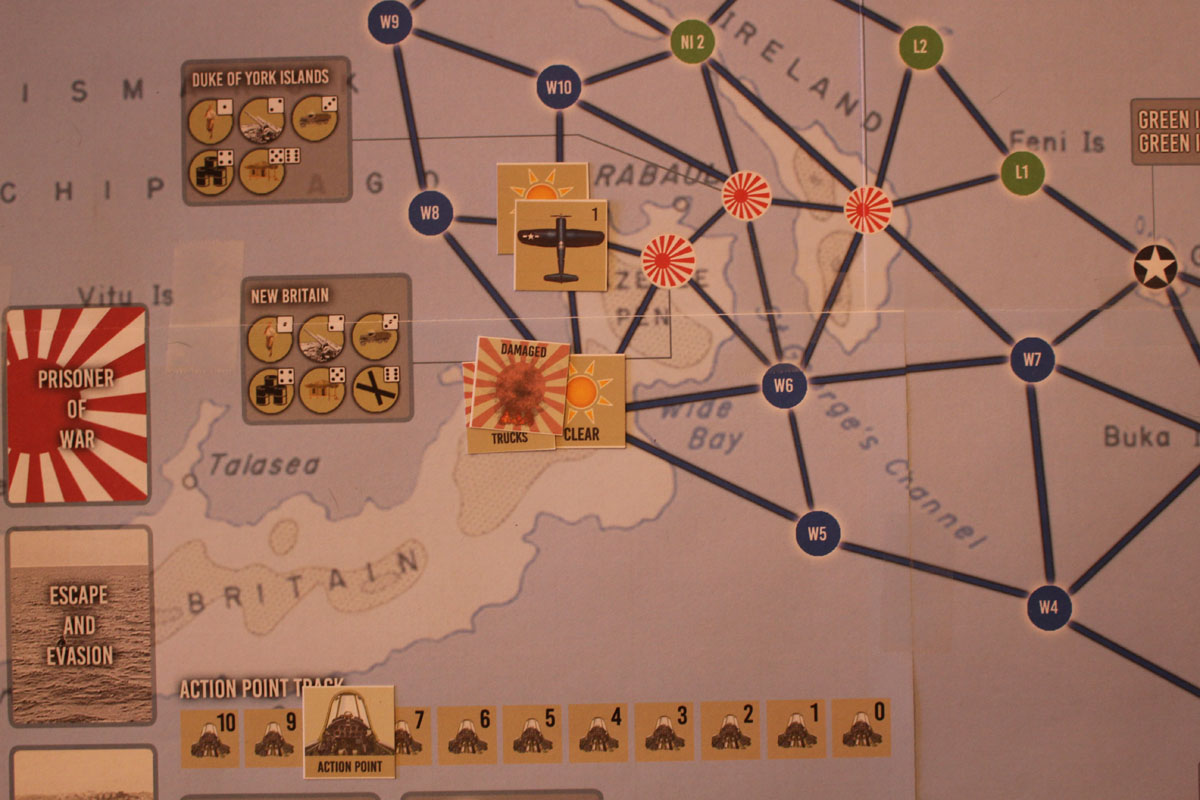
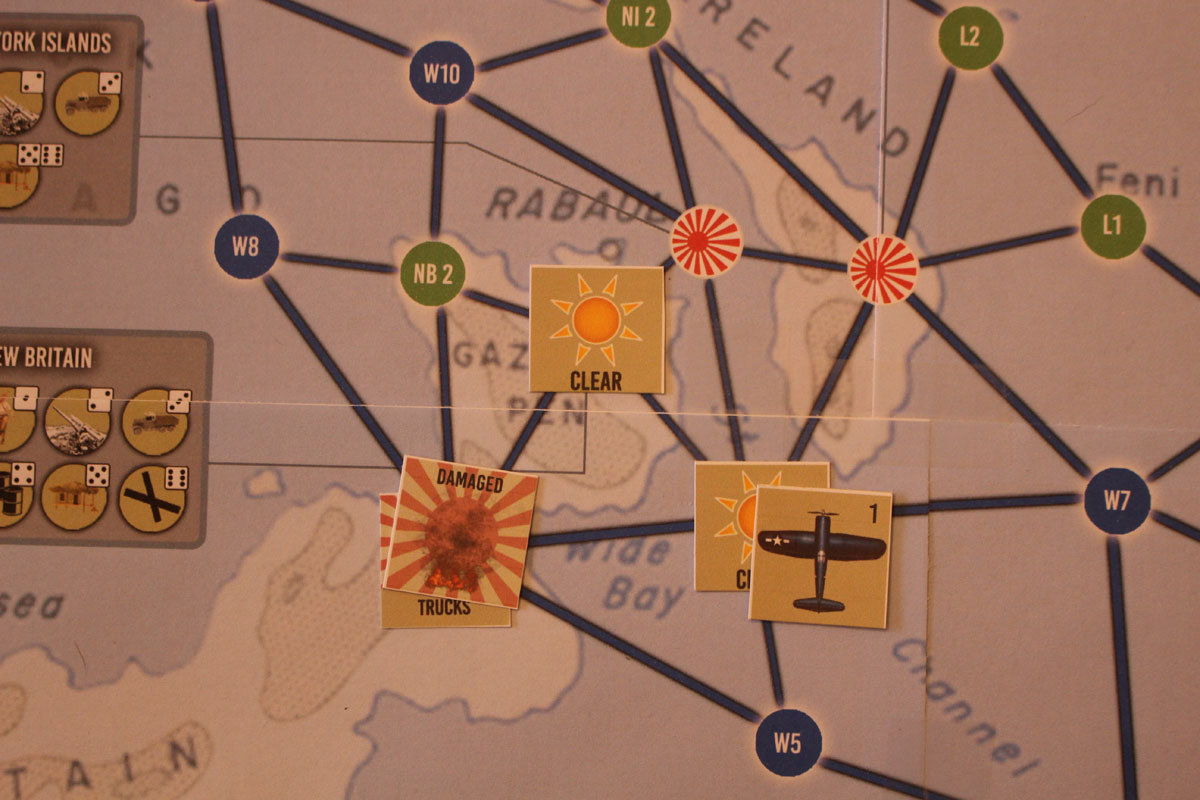
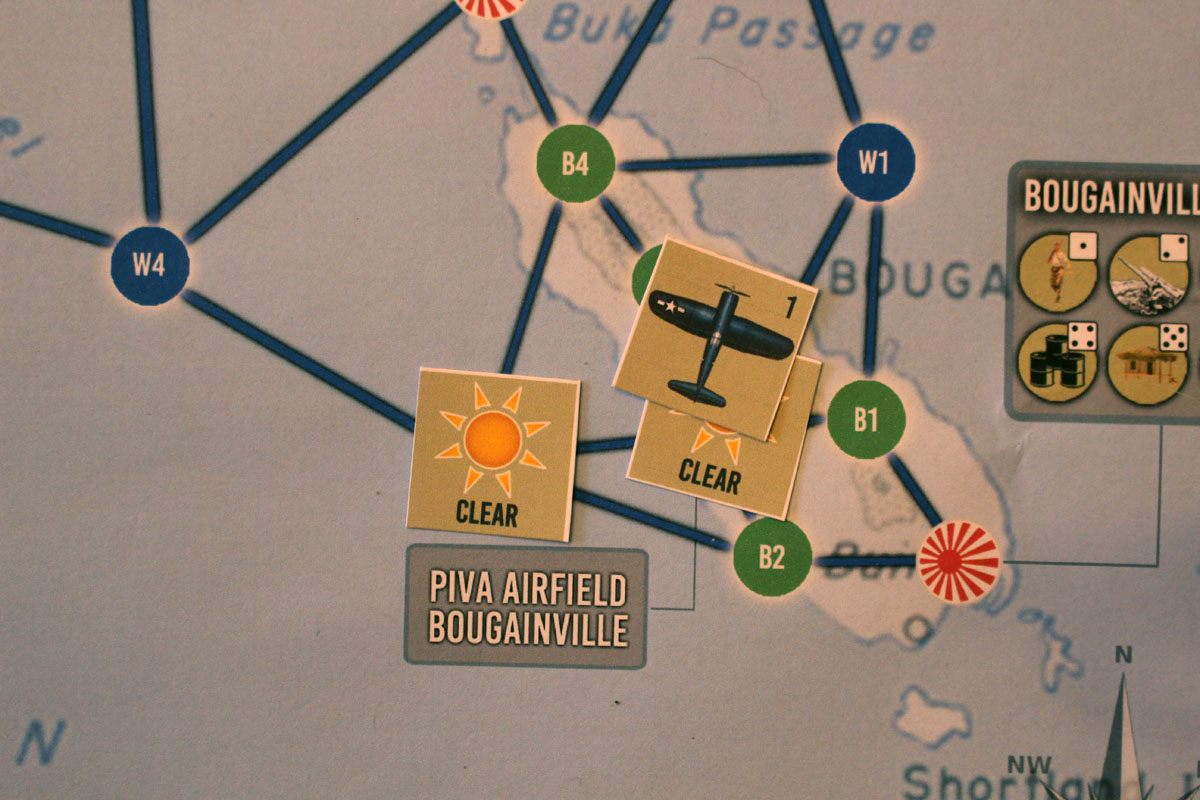
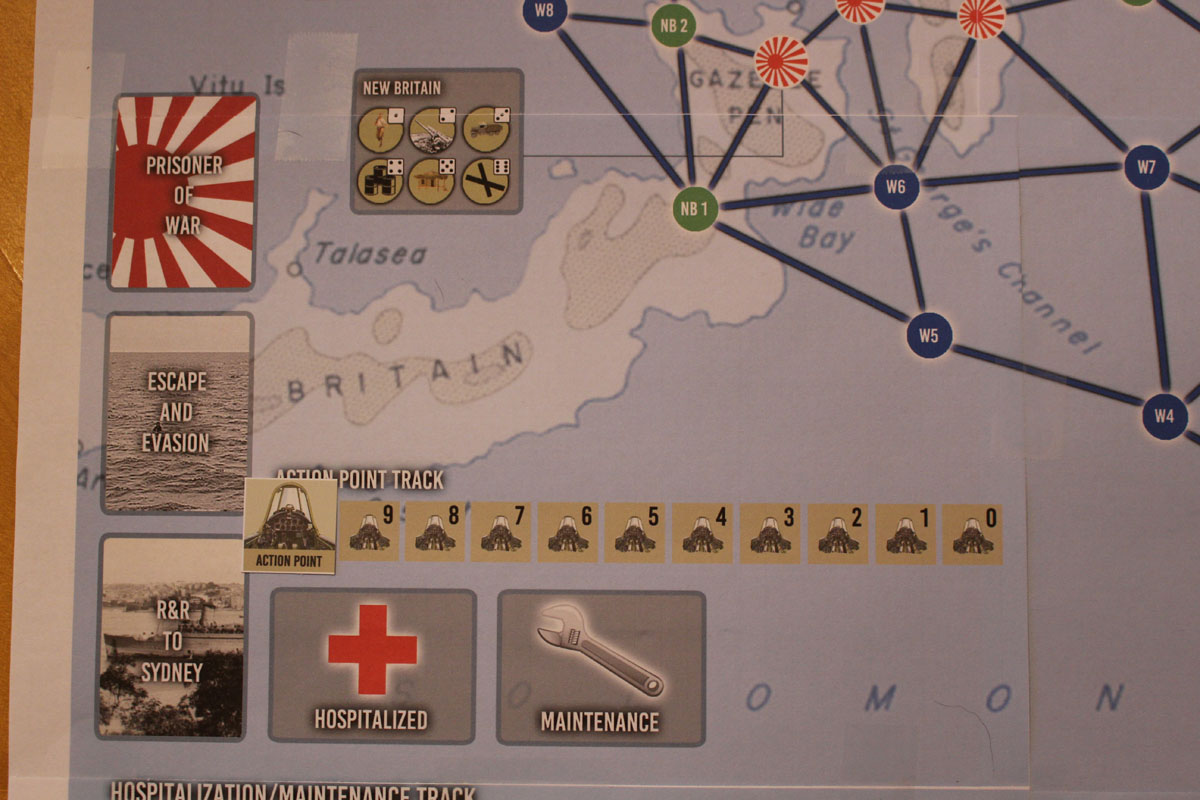
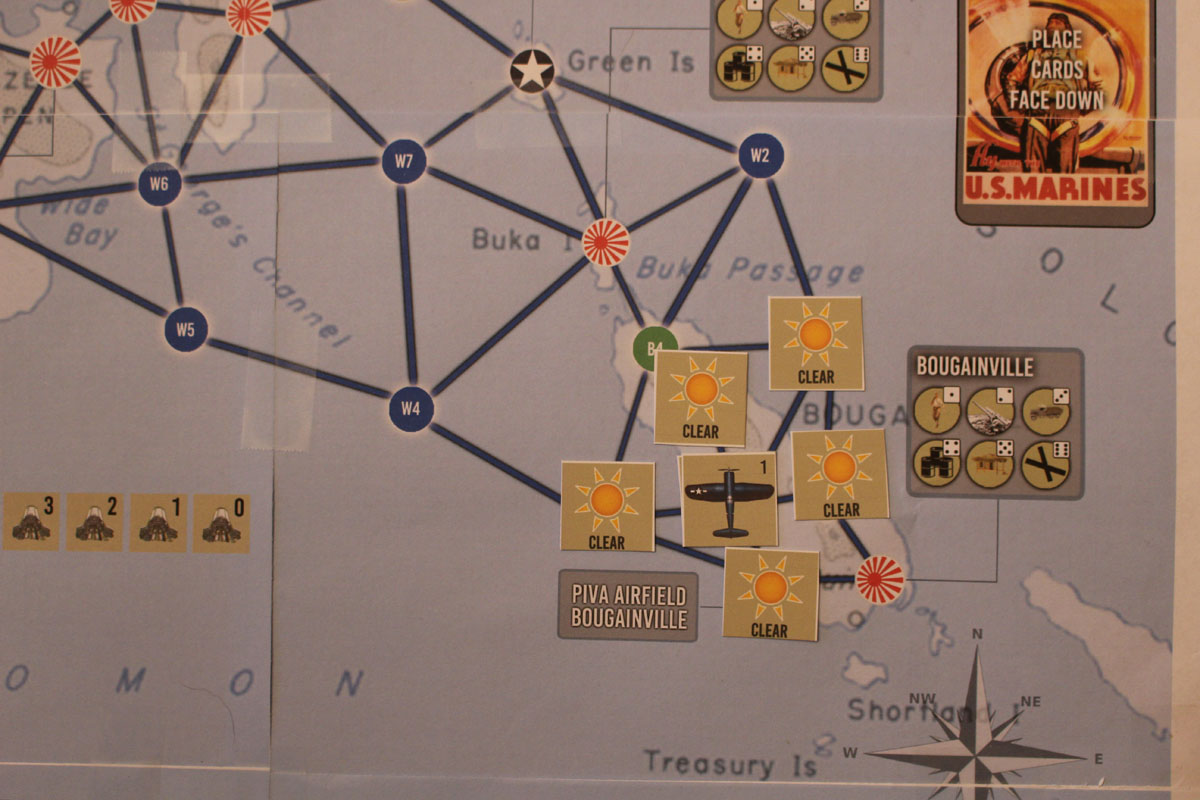
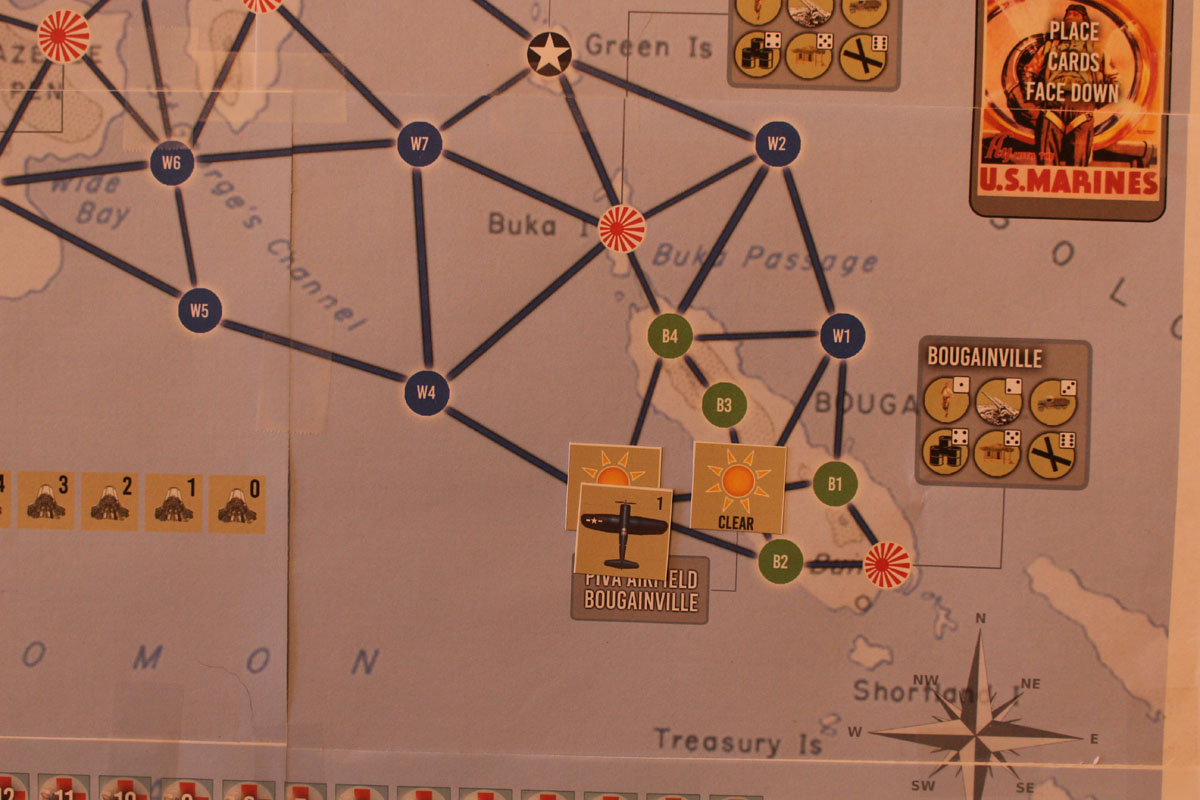
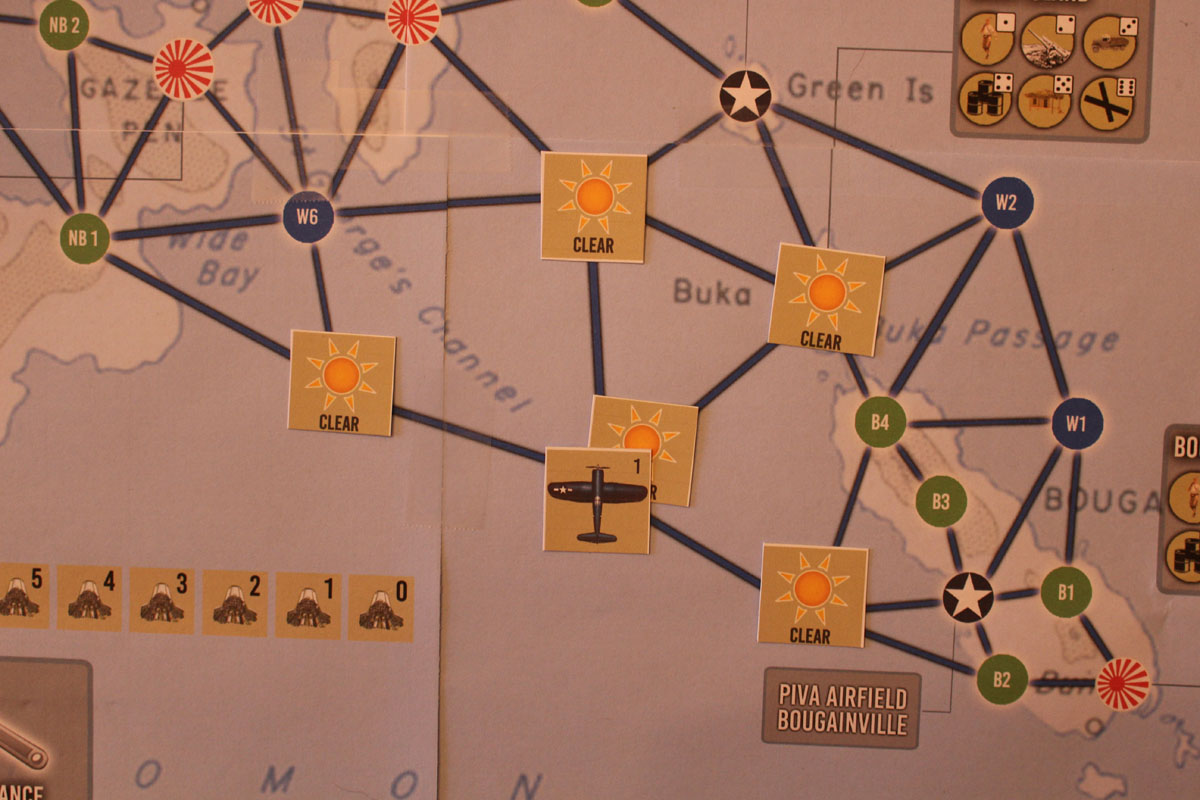
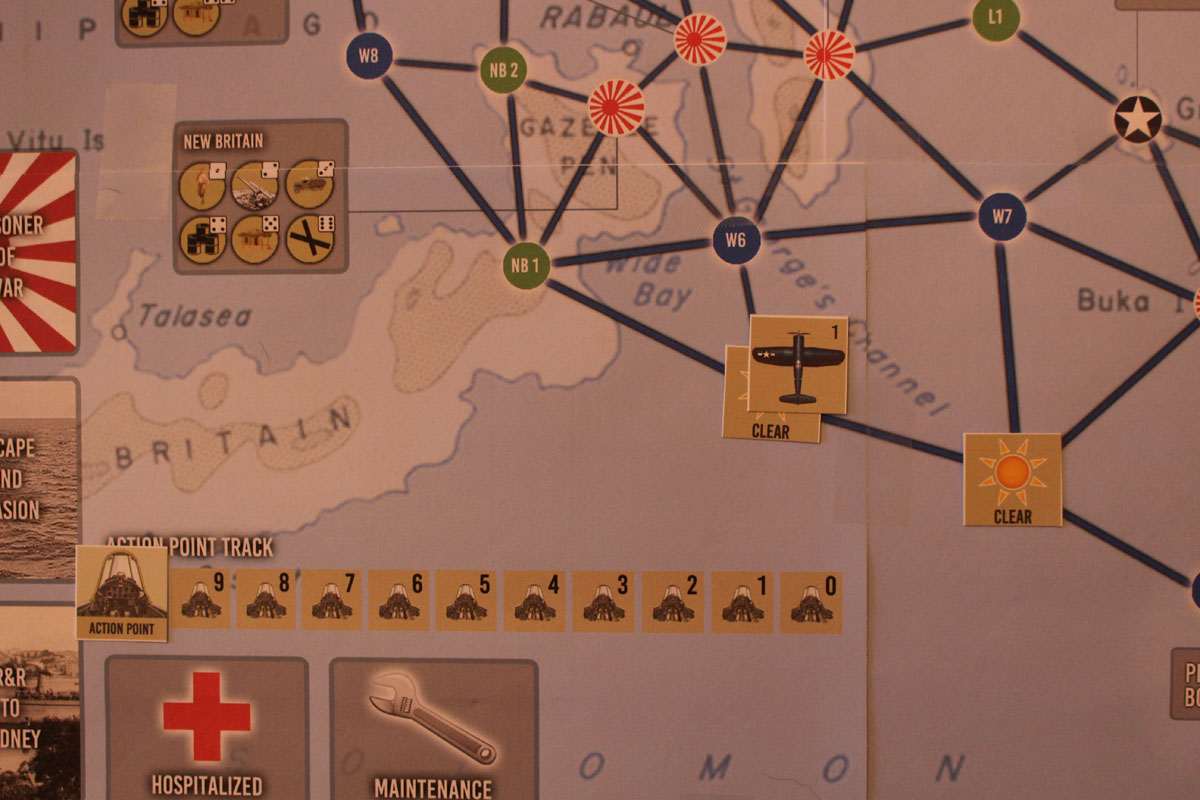
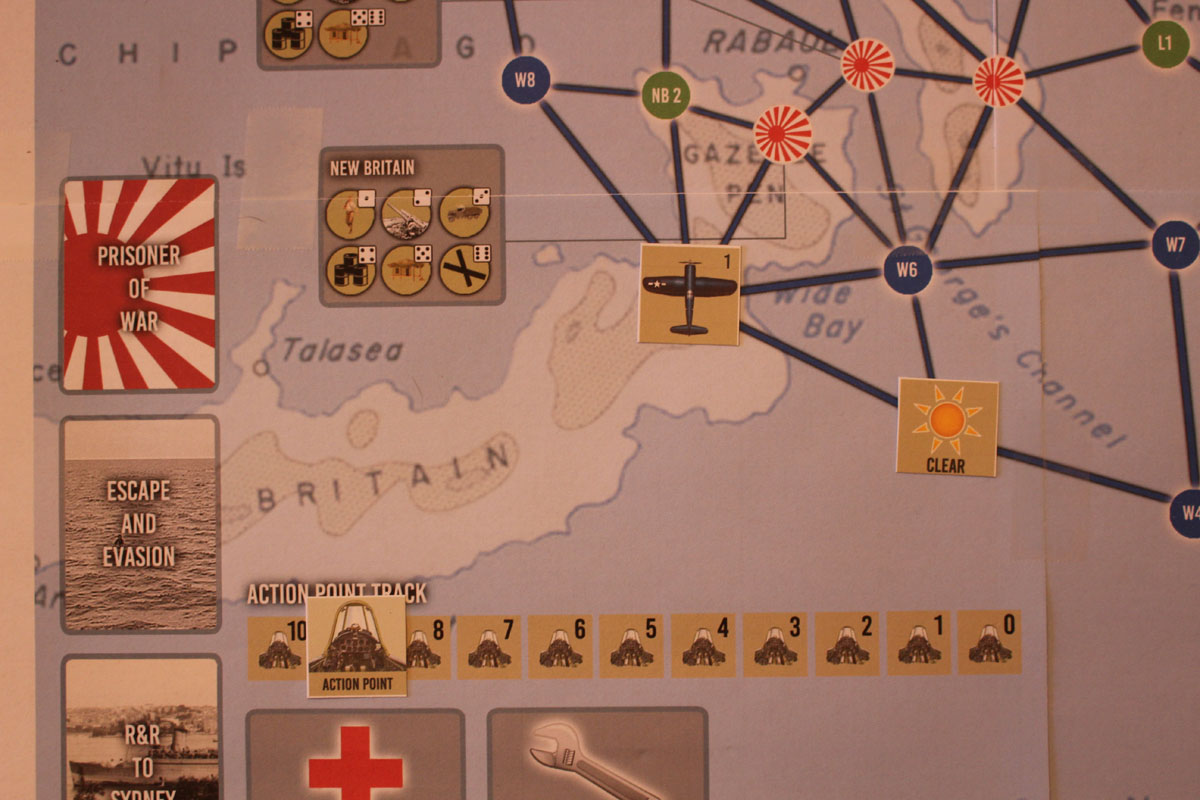
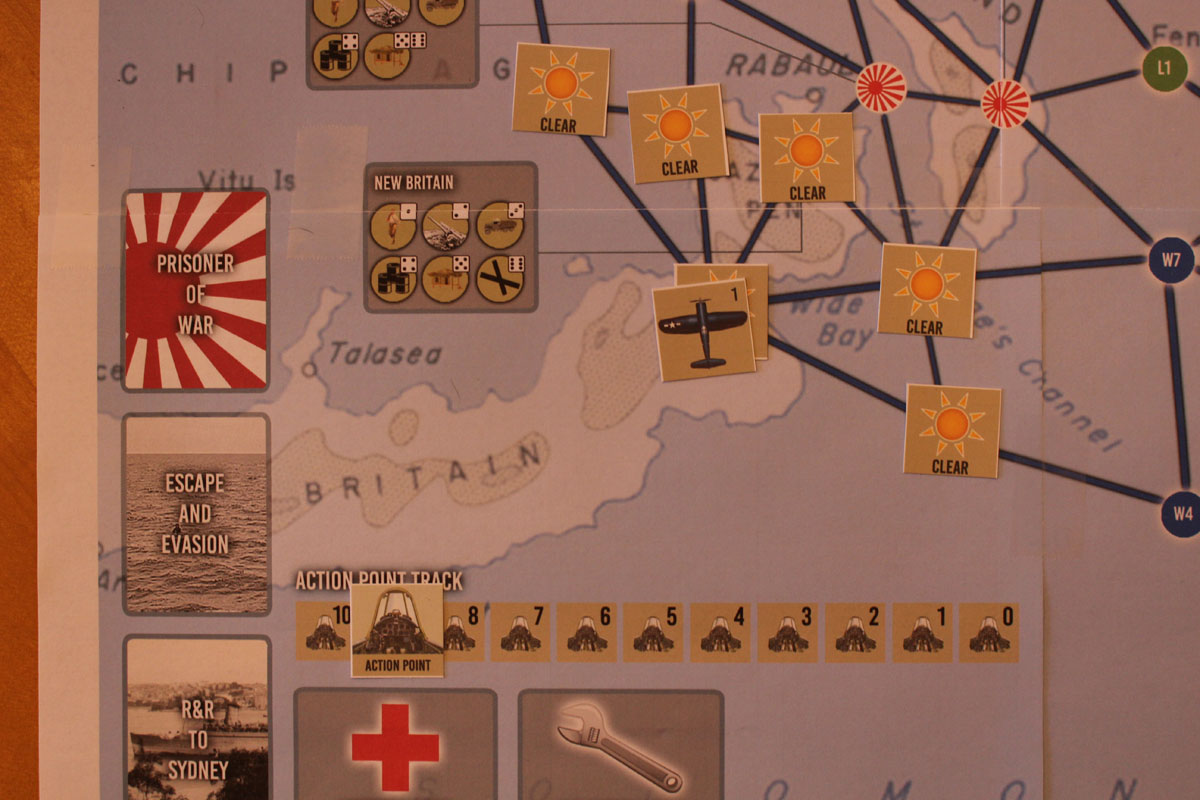
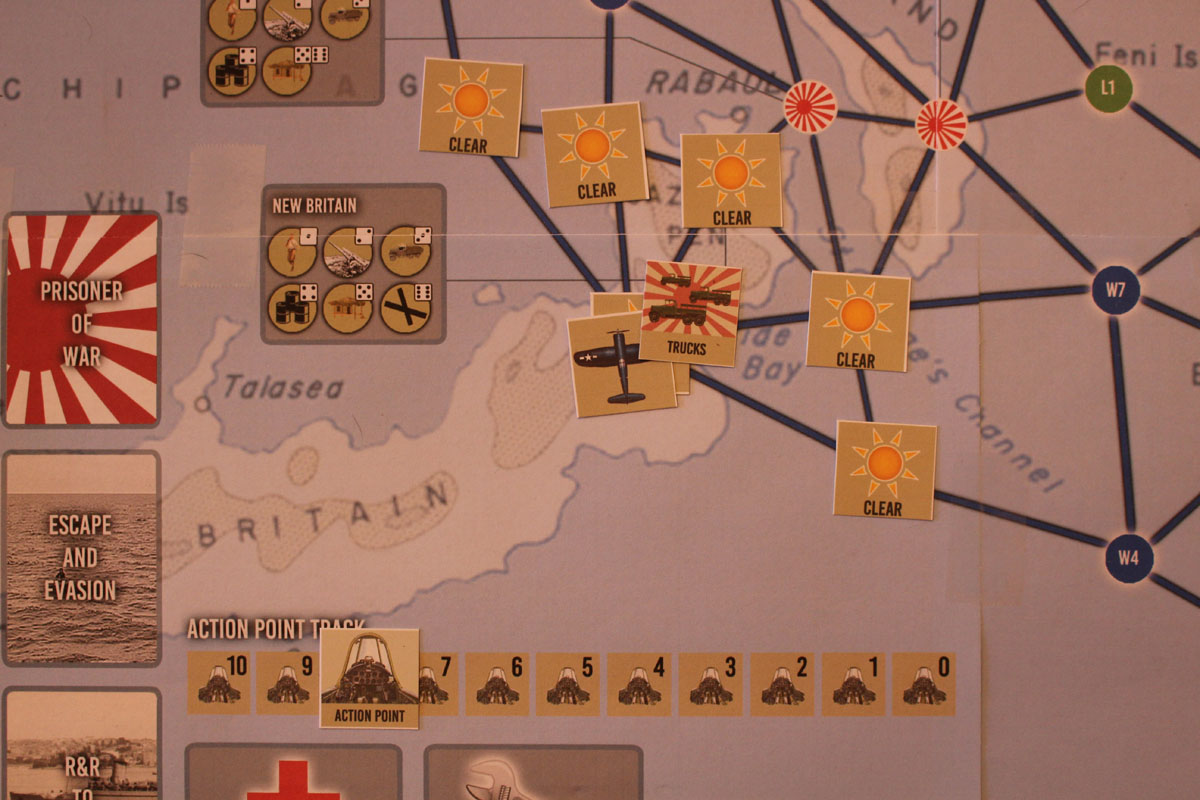
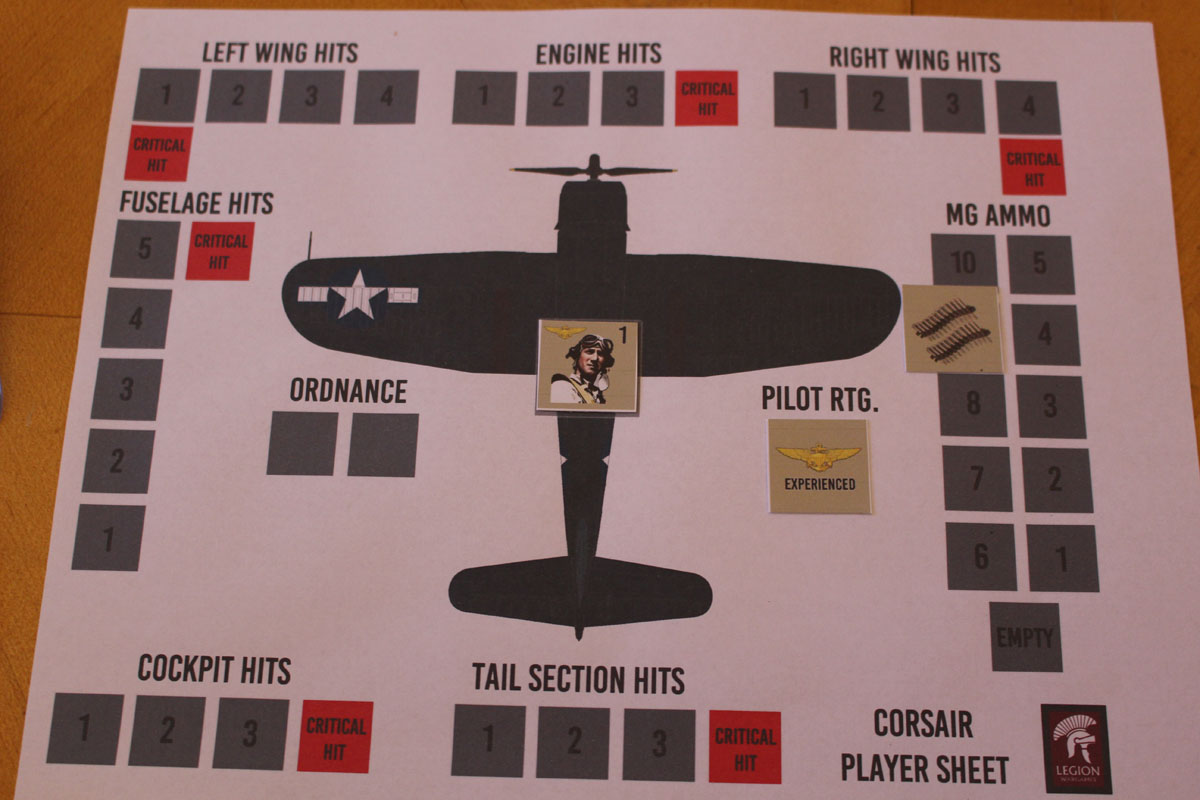
| Mission 1 The sun had not yet risen when I stepped into the ready tent to receive the morning briefing. I had just arrived to join the squadron a few days ago and after a few practice hops to familiarize myself with the area, I was deemed ready to fly a mission. My assignment for my first mission was to patrol the areas over New Britain. I would not be carrying any bombs but did have a full load of .50 caliber ammunition. Permission was given to search any area to and from the patrol area but New Britain was the priority. What the Japanese would do to defend the area was anybody’s guess. The intel briefing didn’t reveal much, so I guess I will find out when I arrive. My takeoff was uneventful and I begin my journey to New Britain. I opt not to search the zone I moved into and continue towards New Britain. I move into Zone W4 and draw a weather card – the weather remains clear. I place counters in the zones directly connected to W4 if no counters exist. Once again I pass on searching and proceed to W5. The weather is clear in W5 since a counter is present, placed there during my last turn. This time I decide to conduct a search. This costs an action point so I move the action marker on the track from 10 to 9. Unfortunately I spot no Japanese unit. I decide not to conduct another search and move on to New Britain, zone NB1. Weather is clear so I will try to spot a Japanese unit. I expend my action point and make my roll. spot some Japanese trucks. They open up on me with some meager fire, missing my plane. I make my strafing pass, damaging the damaging the trucks. I now have a decision to make – do I go around again, or proceed to the next zone. I can earn a point by destroying the trucks but to attack again requires another action point expenditure. There is also the possibility of facing heavier Japanese fire since I have to draw another card. I opt to press on to the next zone, NB2. I move into NB2 and opt not to search – my next move will be the Japanese held zone on NB. (Image 13) The weather card draw results in clear weather. I will be attacking Japanese gun emplacements in the target zone. I make my run on the target, facing meager Japanese fire. They miss, and I now am ready to attack the target. Once again the Japanese deliver a welcome package, but this time my plane his hit twice, taking a hit in the right wing and cockpit. Despite the hits I was able to spot the target (table 3-2) and make my attack. I score an area hit with my machine guns; enough to earn me 1 point for this mission – so far. My ammo is reduced to 8. I now move to the next space on the target track – I can either end the attack or go around for another try at the target. I am going to end my attack. And head back to Piva. I remove my plane from the target track and place it back on the Japanese held zone on NB. I then move to W6. (Image 18) I opt not to search and head to zone W5. I am eager to get back to base. As I move into the remaining zones the weather remains clear. My landing is uneventful. I end up with one point for the area hit result and place the point marker on the victory point track. (Image 19) Because my plane suffered a couple of hits (damage), I place the plane in the maintenance box to determine the length of repairs. Since I suffered no critical hits, I roll 1D10 under the 0 column on Table 10-1. I roll a 4; it’s a quick repair so my plane is available for the next mission. |
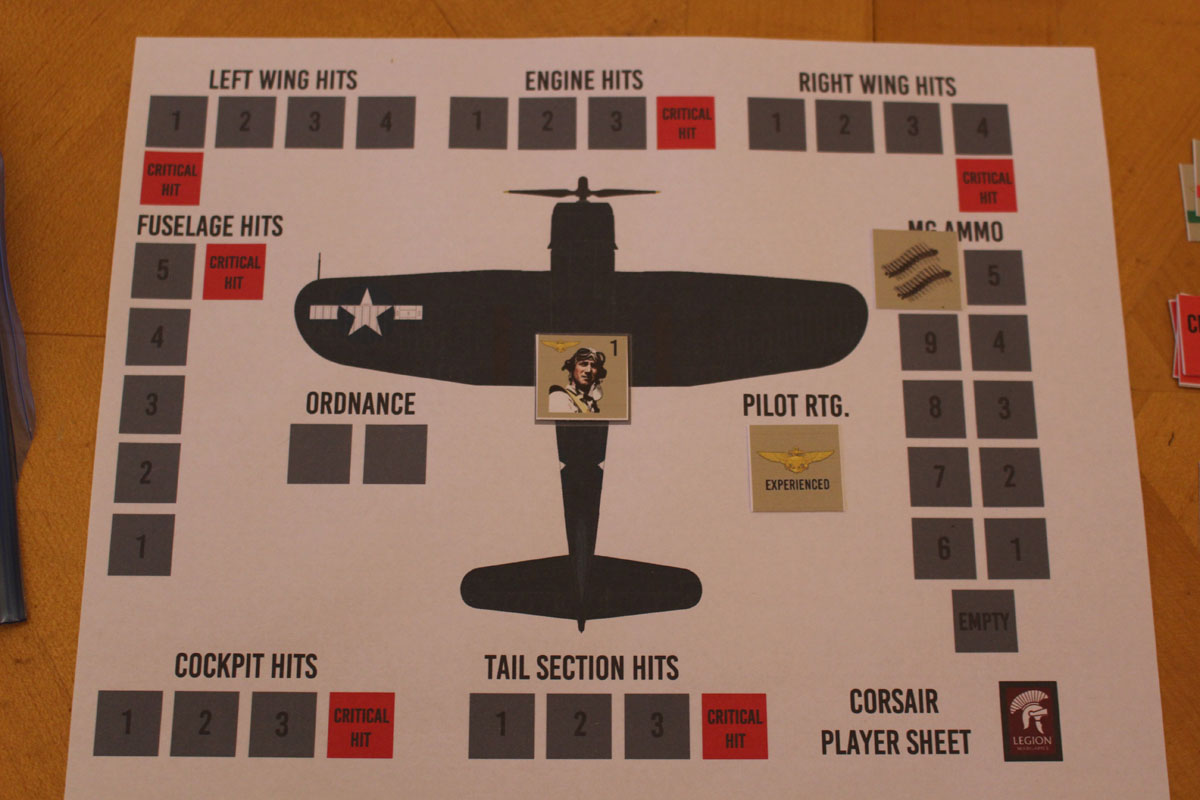
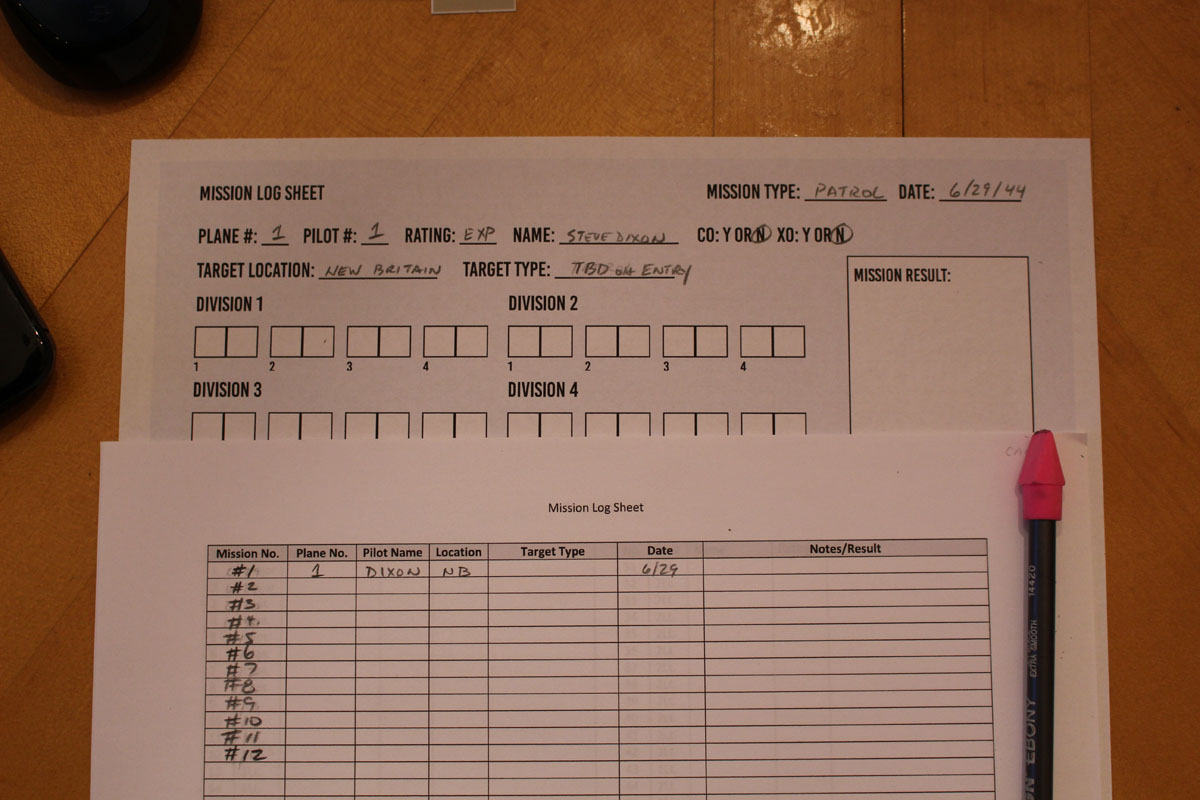
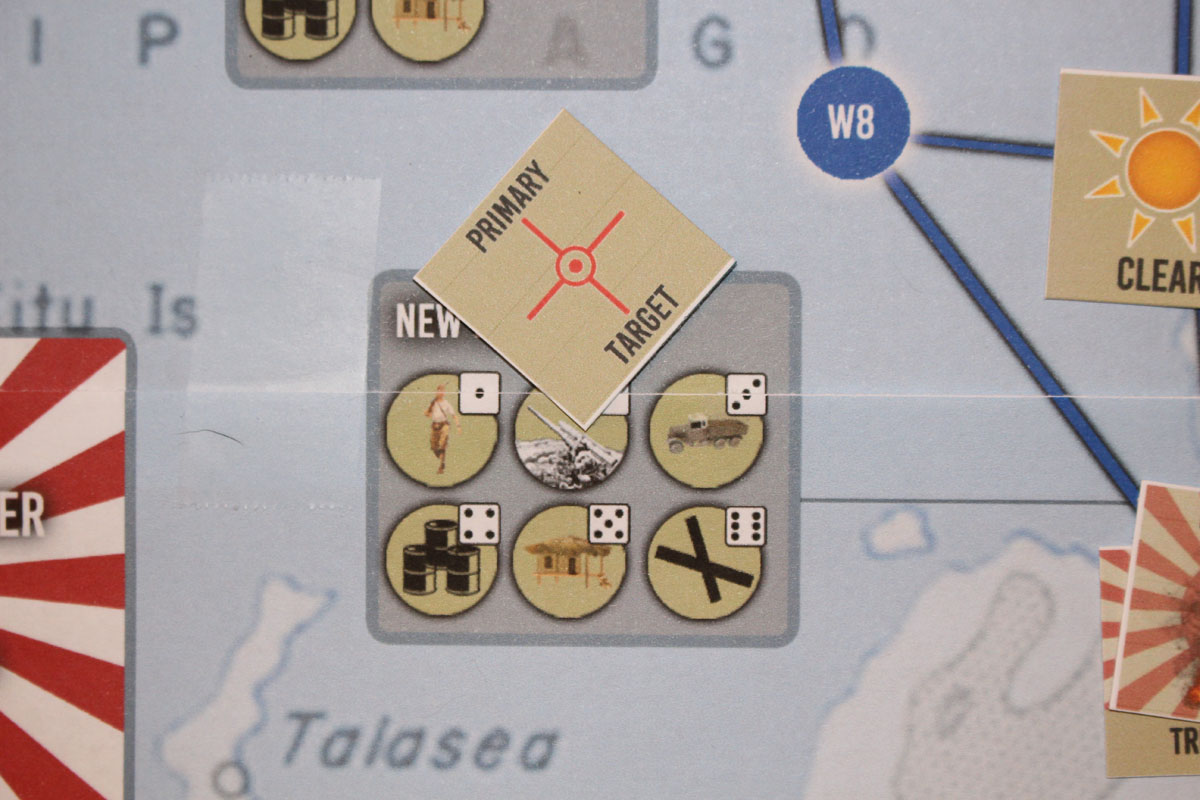
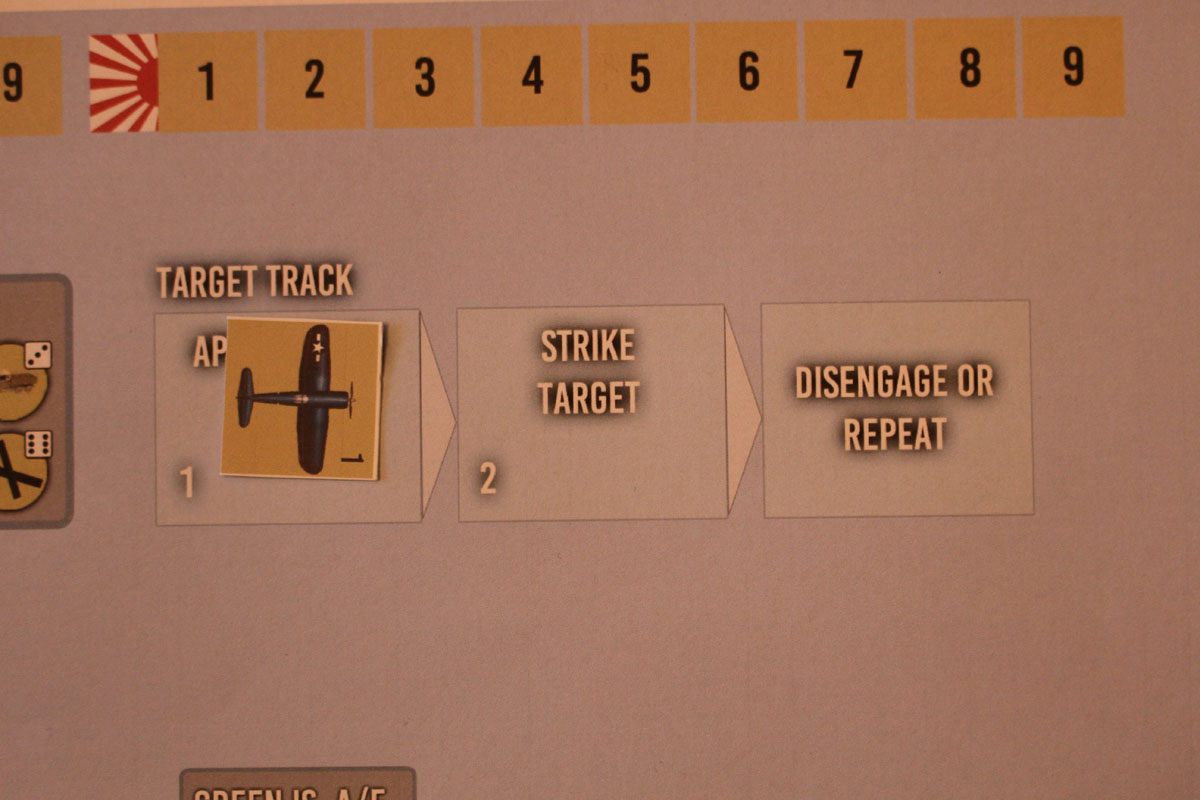
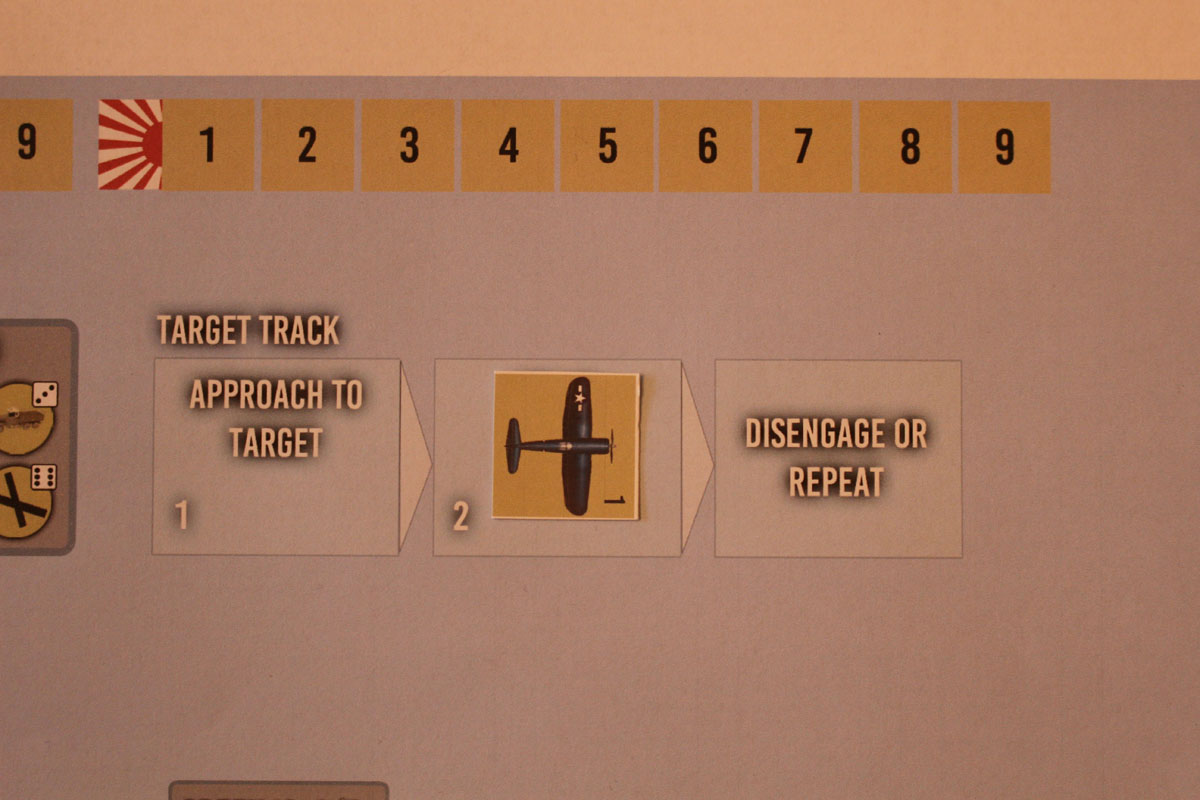
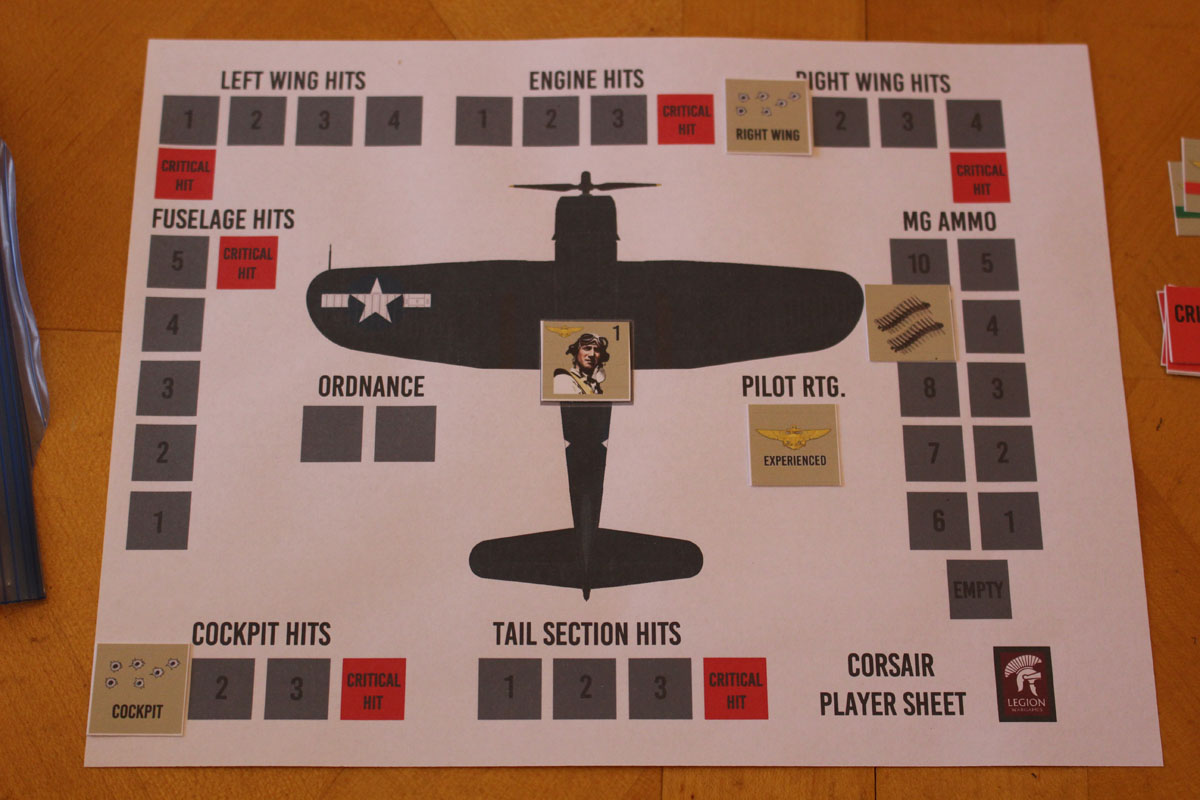
Rules The player performs several steps to get the game ready. In the basic game, the player starts off using plane and pilot counter labeled “1”. The pilot is always experienced in the basic game. The mission is determined by rolling 2D6 on the Basic Game Target Table. For a patrol, the player must fly through all zones in a particular area, attacking any Japanese held zone in the area. The player has the option to search the land zones in the target area – in my case New Britain. He also can search zones to and from the target zone. Searching a zone is always optional. The action point track is perhaps the most important item the player must contend with. The player can use these to search and if necessary skirt bad weather. But there is only a limited amount so the player must be wise in their use. It’s an abstract way to contend with fuel management. (Image 3) He places his pilot counter, experienced counter and machine gun ammo marker on the designated spaces on the Player Corsair sheet. He also fills out his mission log sheet – there are two versions: one is for the mission and the other is to keep track of all missions for the basic game. The campaign for the basic game lasts six days, with the player flying two missions per day. (Image 2, Image 4) Prior to rolling for takeoff (Table 1-1), the weather is determined by card draw. The draw determines the weather for Piva and all surrounding zones connected to Piva. In my case the weather was clear. I place the markers on each of the zones. (Image 1) I can move to any zone as long as they are connected by a solid blue line. These are legal paths of movement. In my case I move to the area labeled W3 (W=water). Because a weather marker is already present I do not draw another card. Weather is determined by card draw for a zone if no marker is present. As I move I remove all weather markers except for the zone I occupy and the zone I moved from. (Image 5, Image 6 and Image 7) Searching a zone includes a series of rolls. The first, Table 3-1 determines if you make contact. In my case I rolled a “7” and looking under the water zone column I find a “No Contact” result. I could try again but it would cost another action point. I opt not to do so since my next three zones will be in my designated patrol area. (Image 8) In NB1, I made a successful contact – Japanese trucks by rolling on Tables 3-1 and 3-1A. In most cases the Japanese fire first so I had to draw a card to determine the intensity of the fire – it was meager. Their fire resulted in a miss on Table 3-1B. I then rolled on Table 3-1C looking under the trucks/MG column. My ammo now stands at “9” on the ammo track due to the attempt. (Image 9, Image 10, Image 11, Image 12) To determine the type of target in a Japanese held zone, I roll 1D6 – in this case a “2”. Looking at the NB Target Space the “2” matches up with the AA icon. I place a primary target marker on that space. I now move my plane to the target track and draw a card to determine Japanese fire. (Image 14) (Image 15) The Japanese scored “2” Hits on my Corsair in the 2 space of the target track. Rolling on Table 4-1 tells me which area is hit. The Critical Hit column is used only when a section of the aircraft has reached its maximum amount of hits. (Image 16) (Image 17) I roll 2D6 on Table 6-1 and look under the AA column and cross reference it with the Machine Guns row. A range of numbers appears in the box. I rolled an 8 which is an area hit. Landing rolls are done on Table 7-1 |
Back to the Forgotten Sideshow Page


